Tuesday, April 8, 2014

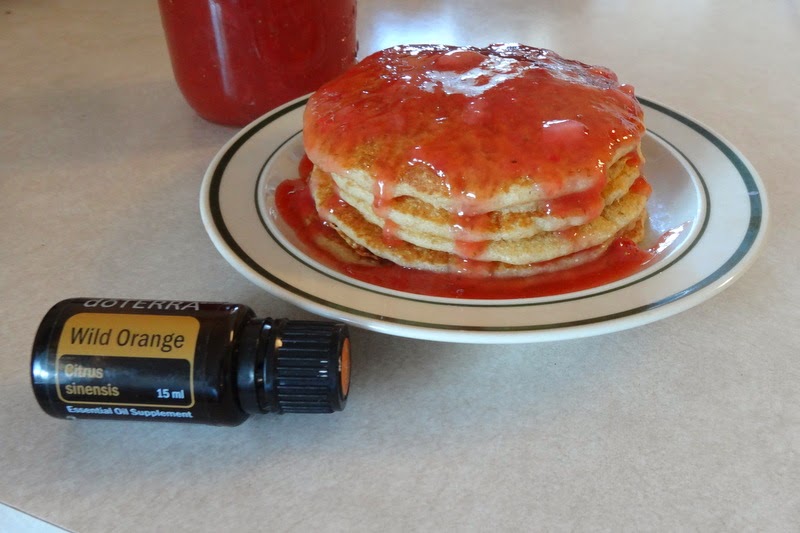
Strawberry Orange Syrup with Wild Orange Essential Oil

I love this syrup and so do my kids! It's spring break, strawberries are on sale and I wanted to make it for them this morning. The only problem was I didn't have oranges, just orange juice. Wild Orange Essential oil is taken from the peal of the orange, so it tastes like orange zest, which this recipe originally calls for. I thought the essential oil would be a great replacement and it was! This was a huge hit!! In fact my youngest had 9 pancakes and he usually only has 3!! I hope you enjoy it as much as we did!

Strawberry Orange Syrup with Wild Orange Essential Oil

Ingredients
3/4 cup strawberry puree
1 drop wild orange essential oil
3/4 teaspoon vanilla extract
3/4 cup evaporated cane juice
1 tablespoon cornstarch
1 cup orange juice

Directions
Add 3/4 cup of the orange juice, strawberry puree, vanilla and evaporated cane juice to a pan. Heat on medium high on stove until syrup mixture starts to boil. Meanwhile, add the cornstarch to the remaining 1/4 cup of orange juice. When the syrup mixture starts to boil add the cornstarch mixture to it and stir for 2 minutes or until desired thickness. Then remove from heat. After the syrup has slightly cooled, add the drop of wild orange essential oil and still well. Serve over whole wheat or gluten free pancakes and Enjoy!

Yield: 1 pint

Friday, December 13, 2013

Ginger Cookies with Essential Oils

Today I got together with some friends for a cookie exchange. I was so excited for it and knew I wanted to start experimenting again. It took several times to get this recipe just right. There isn't much out there to help with conversions when working with essentials oils. They are much more concentrated than dried herbs, so it's a little tricky when trying to substitute them. But it was worth it! I even had someone try one that didn't like ginger cookies and he liked these. I hope you like them as much and I did!

Ingredients
1/2 cup vegetable oil *
1 1/2 cup evaporated cane juice
1/4 cup full flavored molasses
3 eggs
3 drops cinnamon bark essential oil**
2 drops ginger essential oil**
2 drops clove bud essential oil**
3 cups whole wheat flour
2 teaspoons baking soda
1/4 teaspoon salt

Directions
Preheat oven to 350* F. In a mixer, combine oil, eggs, molasses, and essential oils and mix well. Then add the evaporated cane juice and mix for 1 to 2 minutes until light brown in color. In a separate bowl add flour, baking soda and salt and combine well. While the mixer is on, slowly add the flour mixture. Once all added, scrap down sides to make sure all ingredients combine well and mix again. The mixture will be sticky. Use a small ice cream scoop to form small balls. Roll each ball into a bowl of extra evaporated cane juice. Place 12 balls on a sprayed cookie sheet. Press each ball slightly with the bottom of a class cup. Bake for 8-9 minutes. If you over bake they will not be soft. Enjoy warm or cold, and Happy Healthier Eating!!

*if you use coconut oil, make sure it is in a liquid state and you will need to add a few more tablespoons or the batter will be crumbly.

**When adding essential oils while cooking measure them out on a spoon before adding them to any mixture. Some oils tend to come out quicker than others and you don't want to ruin a whole batch because you added to many drops. 

Tuesday, June 26, 2012

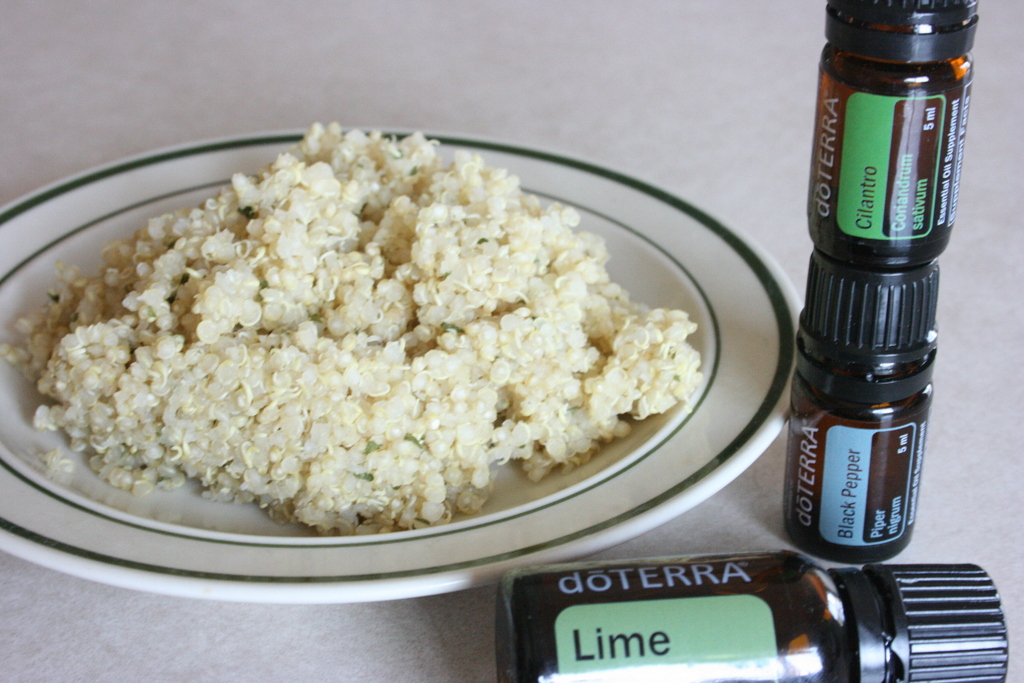
Cilantro Lime Quinoa

I've made this side dish before with all dried herbs and really liked it. So now that I've been cooking more with essential oils I thought it would be perfect to experiment with. I like it so much better with the oils than with the dried herbs. The taste seems to be more light and refreshing. And with this recipe you don't add the oils until the quinoa is cooled down so you get all of the amazing bennifits from the oils without changing their chemical make up, making this dish extremely healthy. I hope you like it as much as I do!

Cilantro Lime Quinoa

Ingredients
1 cup quinoa (rinsed)
2 cups water
1 teaspoon better than bullion
1 drop cilantro doTERRA essential oil
2 drops lime doTERRA essential oil
1 toothpick dipped into black pepper doTERRA essential oil
1 1/2 teaspoon dried parsley
Salt to taste

Directions
Combine quinoa, water and better than bullion into medium sauce pan over high heat until it starts to boil. Then reduce heat to low and let simmer uncovered for 15 minutes. Remove from heat, fluff with a fork and cover for 5 minutes. Uncover and let cool to warm. Then while using a metal spoon, drop oils onto spoon and stir very well to combine oils. Add remaining ingredients, serve and enjoy!

Monday, June 25, 2012

Fresh Tomato Salsa

I have so many recipes to share with you. I've had a lot of fun in the kitchen for the past few weeks now. It was hard to decided which recipe to start with. I ended up choosing this one because one, I am teaching a *'cooking with essential oils' class tomorrow and two, because it's summer and fresh salsa is the best to take to pot luck dinners, to a BBQ, or to just eat at home. I really like how this recipe turned out. It tastes just like the name I picked out for it, 'fresh' and also light. I thought it had the perfect combination of lime and just a hit of heat from the anaheim peppers. I will have to tell you that two of my children, the ones with a very sensitive tough that can't handle mild store bought salsa, didn't like it. They thought it was too quote "Spicy". I think maybe I should have chopped up the onion a little more when I finally had them try it. :] My one child who claims to like spicy food just loved it. Pretty good for a 4 year old. I've had people try it that didn't like lime, that love lime and both said they really liked it. I've taken it to a pot luck dinner and it got good reviews there too. So I hope you enjoy this Fresh tomato salsa!

Fresh Tomato Salsa

Ingredients
3 vine ripened tomatoes-diced
1/2 cup minced onion (about 1/2 small onion)
2 anaheim peppers, minced
3 teaspoons garlic, minced
1 tablespoon dried parsley
3 drops doTERRA lime essential oil
2 drops doTERRA cilantro essential oil
1/4-1/2 teaspoon salt

Directions
In a glass or metal bowl add all ingredients except for the essential oils, mix well. Using a metal spoon drop oils onto spoon and then stir into salsa mixture. Mix for about 1 minute to make sure oils are completely dispersed into vegetables. Refrigerate until read to serve (the longer it sits in the fridge the more the flavors can marry and make it taste that much better! ) with your choice or tortilla chips and enjoy!!

*To join the class simply to go https://www.facebook.com/events/406835429366735/ and click on the link, or go to www.anymeeting.com/azdoterra1 .This is a free class you can watch my power point and listen to me teach about essential oils and cooking all from the comfort of your own home. :]

Thursday, May 3, 2012

Orange Brownies

I've been using Essential oils for 8 years now. I use them all the time on my family, to clean my house, in my chap sticks, and for the past little while I've been experimenting with them in my food. I am loving the results!! Every time I make these brownies and actually share them with people, they beg me for the recipe. So now I am sharing it to you. I love the fresh light orange flavor and dense but extremely moistness of the brownie. My mouth is watering just talking about how good they are. In fact I think I'll make these today and maybe share some with the neighbors. Just don't tell them how much more healthy they are for you than a normal brownie. :]

Orange Brownies

Ingredients
1 1/2 cups gluten free flour mix
2 cups evaporated cane juice
1 teaspoon salt
1 teaspoon guar gum
1 cup white bean puree*
4 large eggs
15 drops 100% Therapeutic Grade Wild Orange Essential oil**
1 teaspoon grated orange zest

Glaze:
1/2 cup organic powdered sugar, measure then sift
1/2 teaspoon finely grated orange zest
1 1/2 tablespoons + fresh orange juice

Directions
For Brownies:
Preheat oven to 350*F. Grease 13X9-inch pan. In a mixing bowl, whisk together flour, evaporated cane juice, guar gum and salt. Add bean puree, eggs, wild orange oil and orange zest. Beat with a handheld mixer until well blended. Pour batter into prepared pan and bake for 30 minutes, or until light golden brown and will bounce back if light pushed on in center. Remove from oven and pierce top of entire cake with a skewer. You may need to wipe off skewer every couple of pierces because these are so moist.

For Glaze:
Combine all ingredients in a bowl, stirring until smooth. Add more juice if needed to create a pouring consistency, not too thick and not too thin. Pour glaze over entire cake, spreading if necessary. Cool cake, cut into squares and enjoy!

*when making a bean puree, pour entire can of white beans and liquid into a food processor or blender. Blend until very smooth, then measure the needed amount for recipe.

**I use doTERRA CTPG essential oils. If using another brand of essential oil I can not guarantee how they will turn out.

Origional source: www.recipegirl.com/2008/08/10/paula-deens-orange-brownies/ 

Thursday, March 29, 2012

Breakfast Burritos

While living at my mom's house last year during our house disaster this is what I made everyone for breakfast on April Fool's Day. Yes the above picture is just scrambled eggs with food coloring. I tried to make it look like ground turkey. My kids are used to that around our house. When my oldest woke up I told him we were having dinner for breakfast. He was not happy and still a little sleepy. After he took the first bite he didn't like it. Then I told him it was just eggs, so he took another bite. He said it still didn't taste that good but he finished it anyways. My other kids thought it was fun and liked the joke and so did the rest of my family that was living there at the time. I hope this Sunday you'll have fun with it. Happy Early April Fool's!

April Fool's Breakfast Burritos

Ingredients
Eggs
Rice milk
Red, green, and orange food coloring
Whole wheat or brown rice tortillas
Ketchup
Salsa
Cheese, shredded

Directions
Whisk eggs and a little milk together with a few drops of each of the food coloring. If the color isn't just right add a few more drops, but not too much. Pour mixture into a hot pan on the stove. Continue scrapping the bottom of the pan until the eggs are completely cooked through. Arrange eggs, salsa or ketchup, and cheese in tortilla to look like a normal burrito. Serve and enjoy!!

Monday, March 12, 2012

Shamrock Pancakes

WOW!! that little break turned into a HUGE break! I'm glad to be back. I've been doing lots in the kitchen, more mishaps than anything else but that's okay because when you finally get a recipe right you know it's got to be good. :]

So in Lu of St. Patrick's Day, which is this Saturday, I thought I would should you what I do every year for breakfast. I've seen a bunch of other things on pinterest that are really cute, But I think I'll still stick with the shamrock shaped ones. They're just so cute!


Shamrock Pancakes


Ingredients

Go here for pancake recipe or use your favorite pancake recipe


Directions

When everything is mixed together put about 5 drops of green food coloring into batter. You can add more or less if you want to. It depends on how green you would like them.


Making the shamrock shape

Use a large spoon. Fill it will batter. Drop a circle of batter down on the griddle and pull down to the left center. Then with more batter, drop another circle of batter off to the left of the first circle and pull some down to the right center. This should make a small heart shape. Repeat action on both sides of your first little heart and finish with a little tail coming from the middle of each of the heart shape and pulling down. Now you have your shamrock. It will take a few tries and if you need to go a little slower, turn the temperature of your griddle down a little so the first little heart shape won't cook so quickly. Once you've got the action down it goes really quick.


Have a fun and healthy St. Patrick's Day!!

Monday, August 1, 2011

Break

Since it is summer, I am going to take a week off. I'll be back next week with more fun and yummy recipes. I hope you have a great week and until next week...

Happy Healthy Eating!!

Friday, July 29, 2011

Fun Food Find Friday!!

This is the powdered milk alternative I used for making sweetened condensed milk and evaporated milk from Wisdom Wednesday, Dari Free non dairy milk alternative. There are also Soy and Rice powdered milk alternatives that you can also use. I chose to use this one because it was a little cheaper, and it was casein free, dairy free, gluten free...the list goes on. I wanted to be able to share with you that there are many alternatives out there. I tried this made up just with water and the power, it really wasn't that bad as far as flavor is concerned, and it really does make a nice sweetened condensed milk and evaporated milk alternative too.

I found this at the health food store.

Thursday, July 28, 2011

Lime Cupcakes

These cupcakes are delicious. They took many, many, MANY tries to get them right. And I'm here to tell you it was worth it! Even those who don't like a lot of lime love these cup cakes. They are light and have a fresh taste to them. I hope you enjoy them as much as we did!

Lime Cupcakes

Ingredients

2 cups spelt flour

1 tablespoon baking powder

1 teaspoon salt

3 eggs

1 cup applesauce

6 tablespoons fresh lime juice

1 recipe (14 oz) sweetened condensed milk (from yesterday)

1 recipe meringue frosting

4 tablespoon grated lime peel

Directions

Preheat oven to 350*F. Fill cupcake tins with cupcake liners. In a medium sized bowl mix flour, baking powder and salt together. Then add eggs, 3 tablespoon lime juice and applesauce. In a small bowl mix remaining lime juice with sweetened condensed milk. Pour 1 tablespoon batter in each cupcake liner. Then add 1/2 tablespoon of the sweetened condensed milk mixture to each cupcake liner. Next add 1-2 tablespoons of the batter to each cupcake liner until they are 3/4 of the way full. Bake for 15-18 minutes. Remove from oven and cool completely before frosting. Add the grated lime peel to the meringue frosting before frosting each cupcake. Serve and enjoy!!

Meringue Frosting

Ingredients

3/4 cup evaporated cane juice

2 large egg white

3 tablespoons water

1/2 teaspoon cream of tartar

1/8 teaspoon fine salt

1 teaspoon vanilla extract

Directions

Bring a few inches of water to a boil in a sauce pan that can hold an electric mixer bowl above the water. Whisk the evaporated can juice, egg whites, water, cream of tartar and salt in a bowl by hand. Set the bowl above the boiling water and beat with an electric hand mixer at medium-high speed until stiff peaks form, about 9 minutes. Remove from the heat and add the vanilla, stir until completely incorporated.

Wednesday, July 27, 2011

Wisdom Wednesday!!

How To...

Today for our Wisdom, I thought it would be fun to tell you how to make Sweetened Condensed Milk at home. I love that you can make this at home and control what goes into it.

To be able to make sweetened condensed milk you have to also know how to make evaporated milk.

Evaporated Milk

Ingredients

2/3 cup Dari Free powdered milk substitute*

3/4 cup warm water

Directions

Add both ingredients in a bowl and whisk until completely dissolved. Makes 1 cup.

Now I can show you how to make...

Sweetened Condensed Milk

Ingredients

1 cup evaporated Milk

1 1/4 cups evaporated cane juice

Directions

In a sauce pan over medium heat add evaporated milk and evaporated cane juice. Stir until completely dissolved. Then remove and let cool. Make sure it is cooled completely before adding it to any recipe. Makes 14 oz equal to 1 can of store bought sweetened condensed milk.

It may seem like a lot of work, but really it is soo easy to make these and they taste the same as the store bought stuff. At least you can now tell people that you know how to make them at home :]. Happier Healthier Eating!!

*On Fun Food Find Friday I'll show you what Dari Free is.

Tuesday, July 26, 2011

Tuna Cakes

Yesterday was a holiday in my state, so today feels like a Monday. I'm a little mixed up this week. :]

I'm trying to branch out a little in my cooking, adding more variety to what I cook. A lot of that is because my husband is backing living full time with us. He used to work 2 and a half hours away, so he would live by his work during the week and come home on the weekends. He loves to try new things. When we used to go out to eat I would always order the same thing and he never did. To this day he doesn't have a favorite food, just variety.

I am happy to say that I'm enjoying 'branching out'. My kids do not like tuna. They won't even eat a tuna sandwich. So I was completely shocked when they loved these tuna cakes! I'm not much of a fish eater and I like these too. They are very moist, the have great flavor (not too tuna-ie) and good texture. My kids like dipping the cakes in a mixture of tartar sauce, ketchup, and relish. I'm sure you can try different toppings. :] Hope you'll try these, they're worth the "branching out".

Tuna Cakes

Ingredients

2 cans (6 1/2 oz each) tuna in water, 1 can drained

1 cup crushed crackers (I used these GF ones)

2 egg whites

2 1/2 tablespoons braggs liquid aminos

1 teaspoon garlic powder

2 tablespoons each finely diced red, yellow, and orange sweet peppers

Directions

Heat oven to 350* F, and lightly spray a baking sheet with non stick cooking spray. Place crushed crackers in a bowl and add tuna, eggs whites, braggs and garlic powder. Mix until well blended. Then add peppers and stir until well distributed. Form mixture into 8 evenly sized patties and place on greased baking sheet. Bake for 8 minutes. Remove from oven and turn each patty over. Return to oven and bake for another 8 minutes. Then remove serve and enjoy with your choice of sauce.

Find orginal recipe here.

Friday, July 22, 2011

Fun Food Find Friday!!

As promised our Fun Find for today is a cake mix, Bob's Red Mill Gluten Free Chocolate Cake Mix. I really liked this cake. The texture was perfect, just like a cake that isn't gluten free. It was very moist and had a very good chocolate flavor.

I bought this at a normal grocery store on sale.

Thursday, July 21, 2011

Chicken Murphy

I'm not completely sure why this was called Chicken Murphy. But it was good. I changed many things from the original recipe. I love how it turned out, it needed more flavor. Not only did I love the taste of this chicken but it was another quick meal. It didn't take long to put together and it's healthy and delicious, what more could you ask for?

Chicken Murphy

Ingredients

4 teaspoons garlic, minced

1 can diced tomatoes with garlic and onion, undrained

1 can diced tomatoes, drained

1/2 teaspoon salt

1/4 teaspoon black pepper

1 1/2 pounds boneless, skinless chicken breasts, cut into 2 inch chunks

1 large red sweet pepper, cut into 1/4 inch slices

1/2 large sweet onion, peeled and diced

1 tablespoon dried parsley flakes

Cooked quinoa

Directions

In a large skillet over medium-high heat cook garlic, onion, and chicken. Stir occasionally until chicken is no longer pink in the center. Stir in tomatoes, salt and pepper. Cook for another three minutes. Add sweet pepper and parsley; cook for an additional 5 minutes or until sauce has thickened. Serve over cooked quinoa and enjoy!

Wednesday, July 20, 2011

Wisdom Wedesday!!


Ever since my children were really little I've tried to introduce them to new and different foods, mostly in the vegetable and fruit worlds. Sometimes they love the new fruit or veggie, and sometimes they don't. If they don't, I try to give it to them in different ways. So far the hardest vegetable, by far, for me to get them to eat is Celery. I've put it in soups, I've smothered it with dressing, I've put it in stir fry, I made 'ants on a log' for them and still they don't like it. Even in the soups they can tell and they pick it out! When I came across this article I decided that with celery, it wasn't that big of a deal to get them to eat it. In this article it lists three vegetables that have the least nutritional value. Celery is on the top of the list. I have never looked at the nutritional value of celery before. So I've come to the conclusion that if my kids never eat celery again it's okay, and I'm not going to try and sneak it in to anything any more. The next time I have this hard of a time getting them to eat something, I'll look at the nutritional value to see if it's worth my time and effort or if it's just better if they eat something else. :] Check out the article here for the other two veggies they talked about. And remember Happier Healthier Eating!!

Tuesday, July 19, 2011

Chocolate Cake with Chocolate Meringue Frosting

There are a lot of Gluten Free cake mixes out there. I bought a few of them to experiment with. It was my husbands birthday a few weeks ago and I thought it would be fun to try out of those mixes on him. Don't worry I asked him first. I'll show you what mix I used for this cake on Friday. I really liked how it turned out! It was perfectly moist and you couldn't tell it was a gluten free cake. I followed the directions on the bag, except for the oil I replaced it with applesauce. You know me, I'm always trying to cut the fat out of everything. :] I really think the frosting made this cake. It was unbelievably delicious!! It will be my go-to chocolate frosting from now on. If you are a chocolate lover and if you want to cut out some fat and not taste this is the frosting for you! Try it you'll love it!!

Chocolate Meringue Frosting

Ingredients

3/4 cup evaporate cane juice

2 large egg whites

3 tablespoons water

1/2 teaspoon cream of tartar

1/8 teaspoon fine salt

3 oz. semi sweet mini morsels

3 tablespoons unsweetened cocoa

1 teaspoon vanilla extract

Directions

Bring a few inches of water to a boil in a saucepan that can hold an electric mixer bowl above the water. Whisk the evaporated cane juice, egg whites, water, cream of tartar, and salt in the bowl. Set the bowl above the boiling water and beat with an electric hand mixer at medium-high speed until stiff peaks form. about 9 minutes. Remove from heat and mini morsels. Gentle stir until morsels are completely melted. Then add cocoa and vanilla extract until well combined. Let frosting cool before frosting cake, and enjoy!!

Friday, July 15, 2011

Fun Food Find Friday!!

When I was young my Grandma would bring us a bag of candy every time she came to visit. One of my favorite things she brought was a mixture of nuts, candy, candy covered nuts, and candy covered licorice. I was so excited when these Panda Candy Coated Licorice candy came out. They remind me of my Grandma, and now my kids and I can enjoy this healthier version of the yummy treats I ate in my youth. Try them you'll love them!

I bought these at the health food stores.

Thursday, July 14, 2011

Grilled Chicken with Tomato and Cucumbers

My tomatoes are growing in my garden, green but still growing. And I saw my first cucumber starting a few days ago. I've been experimenting with recipes that I can use my own veggie in once they finally are ripe. I found this recipe on disneyfamily.com. It's really easy to make, simple to put together, and has a very light but filling taste to it. It's one of those yummy summer dishes you can make and it doesn't add heat to your already hot kitchen. :] Try it you'll love it!

Grilled Chicken with Tomato and Cucumbers

Ingredients

4 boneless skinless chicken breasts

1 medium tomato, seeded and chopped, about 1/2 cup

1/2 small cucumber, peeled, seeded and chopped, bout 1/4 cup

2 tablespoons finely chopped onion

2 tablespoons finely chopped fresh or dried cilantro

1 tablespoon lime juice

1/2 teaspoon salt

Directions

Heart grill over medium flame, or coals

In a medium bowl toss together tomatoes, cucumber, onion, cilantro, lime juice and salt. Refrigerate for 30 minutes.

While those flavors marry together, cook chicken on grill until no longer pink in center; about 7-8 minutes per side (make sure while turning chicken you do NOT poke holes in it. It will cause the juices of the chicken to dry and it will not be moist. ALWAYS turn chicken with tongs). Drain salsa if necessary. Serve over chicken and enjoy!

Tuesday, July 12, 2011

Gluten Free Pizza Dough

If you've ever tried to make Gluten Free pizza dough and you've given up because you can't find one that tastes good, look no further. This recipe is by far the best recipe for Gluten Free Pizza Dough!! The flavor and the texture and perfect. It doesn't feel like you're eating something that is gluten free. Very delicious! And if that wasn't enough it goes together really quick. Oh and did I mention it's fat free? Try it, you'll love it!

Gluten Free Pizza Dough

Ingredients


1 cup warm water

2 1/2 tablespoons honey

2 1/2 tablespoons applesauce
1 teaspoon salt

1 teaspoon instant yeast

1/2 teaspoon gluten free dough enhancer

1/2 teaspoon guar gum

Directions

In the bowl of a mixer, dissolve honey in warm water. Once dissolved, add applesauce, salt, and one cup flour mix. Mix well. Then add yeast, dough enhancer, guar gum and one more cup of the flour mix. Mix well. Slowly add the last 1/2 cup of flour you may not need it all of it. Then leave mixer on for 5 minutes. Dough will be a little sticky. Turn off mixer and let dough rest for another 5 minutes.

Preheat oven to 400*F. Spray hands and cookie sheet with non stick cooking spray. Roll dough out on a sprayed surface to about 1/4 inch in thickness. Place on prepared cookie sheet. Top with your favorite toppings. Bake in oven for 20 minutes. Cool slightly before devouring. :] (Cooking time may vary depending on the thickness of your dough)

Monday, July 11, 2011

Chicken Casserole

In the summer time I like to have a few meals that are easy to throw together. It seems like we're always running around having fun, so having a few quick dinner recipes are great to have on hand. This casserole is really easy to put together, and your kids can help too. I had mine tear up the corn tortillas. They loved it! This casserole has a smooth texture with slight heat, you can always increase the heat by adding more chili powder. :] I loved the flavor.

Chicken Casserole

Ingredients

1 large onion, chopped

1 large bell pepper, chopped (red or green)

2 cups chopped cooked chicken (I used a store bought rotisserie chicken)

1 10oz can cream of chicken soup, undiluted

1 10oz can cream of mushroom soup, undiluted

1 10oz can diced tomatoes

1 4oz can diced green chiles

1/2 teaspoon chili powder

3/4 teaspoon garlic

12 (6-inch) corn tortillas

Cheddar cheese, shredded

Directions

Preheat oven to 375*F. Saute onion and bell pepper in large skillet coated with cooking spray over medium-high heat until tender. Stir in chicken, soups, tomatoes, chiles, chili powder, and garlic powder; remove from heat. Tear tortillas into 1-inch pieces. Layer one-third tortilla pieces in bottom of a 13 x 9-inch baking dish coated with cooking spray. Top with one-third chicken mixture. Repeat layers twice. Top with cheese. Bake uncovered for 30-35 minutes. Cool for a few minutes before serving, and enjoy!