Showing posts with label Gluten Intolerant. Show all posts

Tuesday, June 26, 2012

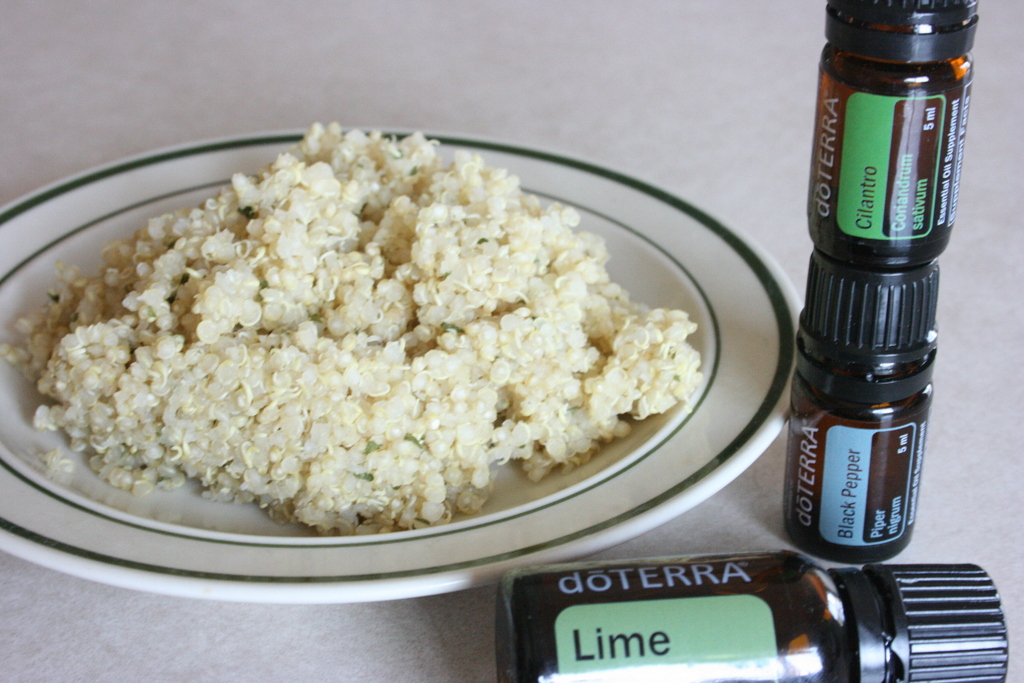
Cilantro Lime Quinoa

I've made this side dish before with all dried herbs and really liked it. So now that I've been cooking more with essential oils I thought it would be perfect to experiment with. I like it so much better with the oils than with the dried herbs. The taste seems to be more light and refreshing. And with this recipe you don't add the oils until the quinoa is cooled down so you get all of the amazing bennifits from the oils without changing their chemical make up, making this dish extremely healthy. I hope you like it as much as I do!

Cilantro Lime Quinoa

Ingredients
1 cup quinoa (rinsed)
2 cups water
1 teaspoon better than bullion
1 drop cilantro doTERRA essential oil
2 drops lime doTERRA essential oil
1 toothpick dipped into black pepper doTERRA essential oil
1 1/2 teaspoon dried parsley
Salt to taste

Directions
Combine quinoa, water and better than bullion into medium sauce pan over high heat until it starts to boil. Then reduce heat to low and let simmer uncovered for 15 minutes. Remove from heat, fluff with a fork and cover for 5 minutes. Uncover and let cool to warm. Then while using a metal spoon, drop oils onto spoon and stir very well to combine oils. Add remaining ingredients, serve and enjoy!

Monday, June 25, 2012

Fresh Tomato Salsa

I have so many recipes to share with you. I've had a lot of fun in the kitchen for the past few weeks now. It was hard to decided which recipe to start with. I ended up choosing this one because one, I am teaching a *'cooking with essential oils' class tomorrow and two, because it's summer and fresh salsa is the best to take to pot luck dinners, to a BBQ, or to just eat at home. I really like how this recipe turned out. It tastes just like the name I picked out for it, 'fresh' and also light. I thought it had the perfect combination of lime and just a hit of heat from the anaheim peppers. I will have to tell you that two of my children, the ones with a very sensitive tough that can't handle mild store bought salsa, didn't like it. They thought it was too quote "Spicy". I think maybe I should have chopped up the onion a little more when I finally had them try it. :] My one child who claims to like spicy food just loved it. Pretty good for a 4 year old. I've had people try it that didn't like lime, that love lime and both said they really liked it. I've taken it to a pot luck dinner and it got good reviews there too. So I hope you enjoy this Fresh tomato salsa!

Fresh Tomato Salsa

Ingredients
3 vine ripened tomatoes-diced
1/2 cup minced onion (about 1/2 small onion)
2 anaheim peppers, minced
3 teaspoons garlic, minced
1 tablespoon dried parsley
3 drops doTERRA lime essential oil
2 drops doTERRA cilantro essential oil
1/4-1/2 teaspoon salt

Directions
In a glass or metal bowl add all ingredients except for the essential oils, mix well. Using a metal spoon drop oils onto spoon and then stir into salsa mixture. Mix for about 1 minute to make sure oils are completely dispersed into vegetables. Refrigerate until read to serve (the longer it sits in the fridge the more the flavors can marry and make it taste that much better! ) with your choice or tortilla chips and enjoy!!

*To join the class simply to go https://www.facebook.com/events/406835429366735/ and click on the link, or go to www.anymeeting.com/azdoterra1 .This is a free class you can watch my power point and listen to me teach about essential oils and cooking all from the comfort of your own home. :]

Thursday, May 3, 2012

Orange Brownies

I've been using Essential oils for 8 years now. I use them all the time on my family, to clean my house, in my chap sticks, and for the past little while I've been experimenting with them in my food. I am loving the results!! Every time I make these brownies and actually share them with people, they beg me for the recipe. So now I am sharing it to you. I love the fresh light orange flavor and dense but extremely moistness of the brownie. My mouth is watering just talking about how good they are. In fact I think I'll make these today and maybe share some with the neighbors. Just don't tell them how much more healthy they are for you than a normal brownie. :]

Orange Brownies

Ingredients
1 1/2 cups gluten free flour mix
2 cups evaporated cane juice
1 teaspoon salt
1 teaspoon guar gum
1 cup white bean puree*
4 large eggs
15 drops 100% Therapeutic Grade Wild Orange Essential oil**
1 teaspoon grated orange zest

Glaze:
1/2 cup organic powdered sugar, measure then sift
1/2 teaspoon finely grated orange zest
1 1/2 tablespoons + fresh orange juice

Directions
For Brownies:
Preheat oven to 350*F. Grease 13X9-inch pan. In a mixing bowl, whisk together flour, evaporated cane juice, guar gum and salt. Add bean puree, eggs, wild orange oil and orange zest. Beat with a handheld mixer until well blended. Pour batter into prepared pan and bake for 30 minutes, or until light golden brown and will bounce back if light pushed on in center. Remove from oven and pierce top of entire cake with a skewer. You may need to wipe off skewer every couple of pierces because these are so moist.

For Glaze:
Combine all ingredients in a bowl, stirring until smooth. Add more juice if needed to create a pouring consistency, not too thick and not too thin. Pour glaze over entire cake, spreading if necessary. Cool cake, cut into squares and enjoy!

*when making a bean puree, pour entire can of white beans and liquid into a food processor or blender. Blend until very smooth, then measure the needed amount for recipe.

**I use doTERRA CTPG essential oils. If using another brand of essential oil I can not guarantee how they will turn out.

Origional source: www.recipegirl.com/2008/08/10/paula-deens-orange-brownies/ 

Friday, July 29, 2011

Fun Food Find Friday!!

This is the powdered milk alternative I used for making sweetened condensed milk and evaporated milk from Wisdom Wednesday, Dari Free non dairy milk alternative. There are also Soy and Rice powdered milk alternatives that you can also use. I chose to use this one because it was a little cheaper, and it was casein free, dairy free, gluten free...the list goes on. I wanted to be able to share with you that there are many alternatives out there. I tried this made up just with water and the power, it really wasn't that bad as far as flavor is concerned, and it really does make a nice sweetened condensed milk and evaporated milk alternative too.

I found this at the health food store.

Thursday, July 28, 2011

Lime Cupcakes

These cupcakes are delicious. They took many, many, MANY tries to get them right. And I'm here to tell you it was worth it! Even those who don't like a lot of lime love these cup cakes. They are light and have a fresh taste to them. I hope you enjoy them as much as we did!

Lime Cupcakes

Ingredients

2 cups spelt flour

1 tablespoon baking powder

1 teaspoon salt

3 eggs

1 cup applesauce

6 tablespoons fresh lime juice

1 recipe (14 oz) sweetened condensed milk (from yesterday)

1 recipe meringue frosting

4 tablespoon grated lime peel

Directions

Preheat oven to 350*F. Fill cupcake tins with cupcake liners. In a medium sized bowl mix flour, baking powder and salt together. Then add eggs, 3 tablespoon lime juice and applesauce. In a small bowl mix remaining lime juice with sweetened condensed milk. Pour 1 tablespoon batter in each cupcake liner. Then add 1/2 tablespoon of the sweetened condensed milk mixture to each cupcake liner. Next add 1-2 tablespoons of the batter to each cupcake liner until they are 3/4 of the way full. Bake for 15-18 minutes. Remove from oven and cool completely before frosting. Add the grated lime peel to the meringue frosting before frosting each cupcake. Serve and enjoy!!

Meringue Frosting

Ingredients

3/4 cup evaporated cane juice

2 large egg white

3 tablespoons water

1/2 teaspoon cream of tartar

1/8 teaspoon fine salt

1 teaspoon vanilla extract

Directions

Bring a few inches of water to a boil in a sauce pan that can hold an electric mixer bowl above the water. Whisk the evaporated can juice, egg whites, water, cream of tartar and salt in a bowl by hand. Set the bowl above the boiling water and beat with an electric hand mixer at medium-high speed until stiff peaks form, about 9 minutes. Remove from the heat and add the vanilla, stir until completely incorporated.

Wednesday, July 27, 2011

Wisdom Wednesday!!

How To...

Today for our Wisdom, I thought it would be fun to tell you how to make Sweetened Condensed Milk at home. I love that you can make this at home and control what goes into it.

To be able to make sweetened condensed milk you have to also know how to make evaporated milk.

Evaporated Milk

Ingredients

2/3 cup Dari Free powdered milk substitute*

3/4 cup warm water

Directions

Add both ingredients in a bowl and whisk until completely dissolved. Makes 1 cup.

Now I can show you how to make...

Sweetened Condensed Milk

Ingredients

1 cup evaporated Milk

1 1/4 cups evaporated cane juice

Directions

In a sauce pan over medium heat add evaporated milk and evaporated cane juice. Stir until completely dissolved. Then remove and let cool. Make sure it is cooled completely before adding it to any recipe. Makes 14 oz equal to 1 can of store bought sweetened condensed milk.

It may seem like a lot of work, but really it is soo easy to make these and they taste the same as the store bought stuff. At least you can now tell people that you know how to make them at home :]. Happier Healthier Eating!!

*On Fun Food Find Friday I'll show you what Dari Free is.

Tuesday, July 26, 2011

Tuna Cakes

Yesterday was a holiday in my state, so today feels like a Monday. I'm a little mixed up this week. :]

I'm trying to branch out a little in my cooking, adding more variety to what I cook. A lot of that is because my husband is backing living full time with us. He used to work 2 and a half hours away, so he would live by his work during the week and come home on the weekends. He loves to try new things. When we used to go out to eat I would always order the same thing and he never did. To this day he doesn't have a favorite food, just variety.

I am happy to say that I'm enjoying 'branching out'. My kids do not like tuna. They won't even eat a tuna sandwich. So I was completely shocked when they loved these tuna cakes! I'm not much of a fish eater and I like these too. They are very moist, the have great flavor (not too tuna-ie) and good texture. My kids like dipping the cakes in a mixture of tartar sauce, ketchup, and relish. I'm sure you can try different toppings. :] Hope you'll try these, they're worth the "branching out".

Tuna Cakes

Ingredients

2 cans (6 1/2 oz each) tuna in water, 1 can drained

1 cup crushed crackers (I used these GF ones)

2 egg whites

2 1/2 tablespoons braggs liquid aminos

1 teaspoon garlic powder

2 tablespoons each finely diced red, yellow, and orange sweet peppers

Directions

Heat oven to 350* F, and lightly spray a baking sheet with non stick cooking spray. Place crushed crackers in a bowl and add tuna, eggs whites, braggs and garlic powder. Mix until well blended. Then add peppers and stir until well distributed. Form mixture into 8 evenly sized patties and place on greased baking sheet. Bake for 8 minutes. Remove from oven and turn each patty over. Return to oven and bake for another 8 minutes. Then remove serve and enjoy with your choice of sauce.

Find orginal recipe here.

Friday, July 22, 2011

Fun Food Find Friday!!

As promised our Fun Find for today is a cake mix, Bob's Red Mill Gluten Free Chocolate Cake Mix. I really liked this cake. The texture was perfect, just like a cake that isn't gluten free. It was very moist and had a very good chocolate flavor.

I bought this at a normal grocery store on sale.

Tuesday, July 19, 2011

Chocolate Cake with Chocolate Meringue Frosting

There are a lot of Gluten Free cake mixes out there. I bought a few of them to experiment with. It was my husbands birthday a few weeks ago and I thought it would be fun to try out of those mixes on him. Don't worry I asked him first. I'll show you what mix I used for this cake on Friday. I really liked how it turned out! It was perfectly moist and you couldn't tell it was a gluten free cake. I followed the directions on the bag, except for the oil I replaced it with applesauce. You know me, I'm always trying to cut the fat out of everything. :] I really think the frosting made this cake. It was unbelievably delicious!! It will be my go-to chocolate frosting from now on. If you are a chocolate lover and if you want to cut out some fat and not taste this is the frosting for you! Try it you'll love it!!

Chocolate Meringue Frosting

Ingredients

3/4 cup evaporate cane juice

2 large egg whites

3 tablespoons water

1/2 teaspoon cream of tartar

1/8 teaspoon fine salt

3 oz. semi sweet mini morsels

3 tablespoons unsweetened cocoa

1 teaspoon vanilla extract

Directions

Bring a few inches of water to a boil in a saucepan that can hold an electric mixer bowl above the water. Whisk the evaporated cane juice, egg whites, water, cream of tartar, and salt in the bowl. Set the bowl above the boiling water and beat with an electric hand mixer at medium-high speed until stiff peaks form. about 9 minutes. Remove from heat and mini morsels. Gentle stir until morsels are completely melted. Then add cocoa and vanilla extract until well combined. Let frosting cool before frosting cake, and enjoy!!

Thursday, July 14, 2011

Grilled Chicken with Tomato and Cucumbers

My tomatoes are growing in my garden, green but still growing. And I saw my first cucumber starting a few days ago. I've been experimenting with recipes that I can use my own veggie in once they finally are ripe. I found this recipe on disneyfamily.com. It's really easy to make, simple to put together, and has a very light but filling taste to it. It's one of those yummy summer dishes you can make and it doesn't add heat to your already hot kitchen. :] Try it you'll love it!

Grilled Chicken with Tomato and Cucumbers

Ingredients

4 boneless skinless chicken breasts

1 medium tomato, seeded and chopped, about 1/2 cup

1/2 small cucumber, peeled, seeded and chopped, bout 1/4 cup

2 tablespoons finely chopped onion

2 tablespoons finely chopped fresh or dried cilantro

1 tablespoon lime juice

1/2 teaspoon salt

Directions

Heart grill over medium flame, or coals

In a medium bowl toss together tomatoes, cucumber, onion, cilantro, lime juice and salt. Refrigerate for 30 minutes.

While those flavors marry together, cook chicken on grill until no longer pink in center; about 7-8 minutes per side (make sure while turning chicken you do NOT poke holes in it. It will cause the juices of the chicken to dry and it will not be moist. ALWAYS turn chicken with tongs). Drain salsa if necessary. Serve over chicken and enjoy!

Tuesday, July 12, 2011

Gluten Free Pizza Dough

If you've ever tried to make Gluten Free pizza dough and you've given up because you can't find one that tastes good, look no further. This recipe is by far the best recipe for Gluten Free Pizza Dough!! The flavor and the texture and perfect. It doesn't feel like you're eating something that is gluten free. Very delicious! And if that wasn't enough it goes together really quick. Oh and did I mention it's fat free? Try it, you'll love it!

Gluten Free Pizza Dough

Ingredients


1 cup warm water

2 1/2 tablespoons honey

2 1/2 tablespoons applesauce
1 teaspoon salt

1 teaspoon instant yeast

1/2 teaspoon gluten free dough enhancer

1/2 teaspoon guar gum

Directions

In the bowl of a mixer, dissolve honey in warm water. Once dissolved, add applesauce, salt, and one cup flour mix. Mix well. Then add yeast, dough enhancer, guar gum and one more cup of the flour mix. Mix well. Slowly add the last 1/2 cup of flour you may not need it all of it. Then leave mixer on for 5 minutes. Dough will be a little sticky. Turn off mixer and let dough rest for another 5 minutes.

Preheat oven to 400*F. Spray hands and cookie sheet with non stick cooking spray. Roll dough out on a sprayed surface to about 1/4 inch in thickness. Place on prepared cookie sheet. Top with your favorite toppings. Bake in oven for 20 minutes. Cool slightly before devouring. :] (Cooking time may vary depending on the thickness of your dough)

Monday, July 11, 2011

Chicken Casserole

In the summer time I like to have a few meals that are easy to throw together. It seems like we're always running around having fun, so having a few quick dinner recipes are great to have on hand. This casserole is really easy to put together, and your kids can help too. I had mine tear up the corn tortillas. They loved it! This casserole has a smooth texture with slight heat, you can always increase the heat by adding more chili powder. :] I loved the flavor.

Chicken Casserole

Ingredients

1 large onion, chopped

1 large bell pepper, chopped (red or green)

2 cups chopped cooked chicken (I used a store bought rotisserie chicken)

1 10oz can cream of chicken soup, undiluted

1 10oz can cream of mushroom soup, undiluted

1 10oz can diced tomatoes

1 4oz can diced green chiles

1/2 teaspoon chili powder

3/4 teaspoon garlic

12 (6-inch) corn tortillas

Cheddar cheese, shredded

Directions

Preheat oven to 375*F. Saute onion and bell pepper in large skillet coated with cooking spray over medium-high heat until tender. Stir in chicken, soups, tomatoes, chiles, chili powder, and garlic powder; remove from heat. Tear tortillas into 1-inch pieces. Layer one-third tortilla pieces in bottom of a 13 x 9-inch baking dish coated with cooking spray. Top with one-third chicken mixture. Repeat layers twice. Top with cheese. Bake uncovered for 30-35 minutes. Cool for a few minutes before serving, and enjoy!

Thursday, July 7, 2011

Raspberry Vanilla Marshmallows

What a fun extra long weekend we had with family! I hope everyone in the U.S. had a great 4th of July celebration. Now back to food fun. :]

It's summer, so that means camping and s'mores over the fire. These marshmallows are divine! When you melt these and make them into a s'more it is unlike any s'more you've ever tasted. To me they taste like raspberry cheese cake with chocolate drizzled on top. Really they are that good. I've shared them with even those who don't like marshmallows and they have liked them. You'll be the hit at the fire pit if you bring these. :]

Raspberry Vanilla Marshmallows

Ingredients

3 1/2 envelopes (2 tablespoons but 2 1/2 teaspoons) unflavored gelatin

1 cup cold water, dived

2 cups evaporated cane juice

1/2 cup agave

1/4 teaspoon salt

2 large egg whites

3/4 tablespoon raspberry extract

1/2 tablespoon vanilla

3 drops red food coloring

1 to 2 cups organic powdered sugar for dusting

Directions

Grease bottom and sides of a 13 by 9 inch rectangular metal baking pan and dust bottom and sides with organic powdered sugar. In a bowl of a standing electric mixer sprinkle gelatin over 1/2 cup cold water, and let stand to soften and absorb completely.

In a sauce pan cook evaporated cane juice, agave, second 1/2 cup cold water, and salt over low heat. Stir with a wooden spoon until evaporated cane juice is dissolved. Increase heat to moderate, cover, and boil mixture. Once boiling, insert candy or digital thermometer and continue cooking until temperature reaches 240*F (soft ball stage). Remove pan from heat and pour cane juice mixture over gelatin mixture. Stir until gelatin is dissolved.

With standing mixer, beat on high speed until white, thick, and nearly tripled in volume, about 6 minutes. Meanwhile, in a separate bowl with clean beaters beat egg whites until they just hold stiff peaks. Then add into gelatin mixture with raspberry and vanilla extracts until just combined. Add food coloring and slightly swirl. Pour marshmallow mixture into prepared pan. Sift organic powdered sugar evenly over top. Chill in refrigerator, uncovered, until firm at least 3 hours or up to one day.

When marshmallows are set, run a thin knife around edges of pan and invert pan onto a large cutting board. Lifting up one corner of inverted pan, with fingers, loosen marshmallow and ease onto cutting board. With a large knife trim edges of marshmallow and cut marshmallow into one inch cubes. Pour organic powdered sugar into empty baking pan. Dip each side of marshmallows into organic powdered sugar to avoid sticking together once they are cut. Place in zip lock back and leave in refrigerator until ready to use. Store for 2 to 3 weeks, and enjoy!

Thursday, June 30, 2011

Flag Cake

Repost from last year: Since this weekend is the 4th of July I thought it would be a good idea to show you again the flag cake. When I saw the demonstration on how to put a flag cake together here, it looked so fun. I knew I could make it a healthy cake. And I wanted to make it for the 4th of July. I'm posting it now because I live in Utah and we still have our statehood celebration coming up on the 24th. So it can be made again. If you live outside of Utah keep this in mind for next year. :]

It doesn't have food coloring, which is nice because in the original recipe you have to use tons of red food coloring to make the stripes, and it's made from a cake mix. You really can't tell very well in the picture the white and red stripes, white is on the bottom layer, then red, white, and red again. I guess you could put a few drops in this cake if you wanted to make them a little more visible. The only thing I wish I would have done different is frost it the day I served it. I frosted it the night before because I wouldn't have time the next day and the frosting started to blend into the layers. Other than that it was a very moist, yummy berry cake! Have fun with it!


Low Gluten Flag Cake


Ingredients


2 tablespoons baking powder

1 teaspoon salt

1/2 teaspoon xantham gum

1 teaspoon baking soda

1 1/4 cup evaporated cane juice

1/4 cup oil

1/4 cup applesauce

2 eggs

1 cup rice milk

1 1/2 teaspoon vanilla extract

-----

3/4 cup applesauce

3/4 cup blueberry puree

3/4 cup strawberry puree
Directions

Preheat oven to 350*F. Grease and line bottom of three 9" round cake pans with parchment paper.

In two separate bowls (you're making a double batch, the recipe above is for a single batch) mix together flour, baking powder, baking soda, xantham gum, salt, and evaporated cane juice. Then add eggs, oil, applesauce, rice milk, and vanilla and mix well. Divide the batters into thirds, about 2 1/2 to 2 3/4 cups, into three separate bowls (If there is left over batter you can make cupcakes). In one bowl add 3/4 cup applesauce, this will be your white layer, and mix well. In a second bowl add 3/4 cup blueberry puree, this will be your blue layer, and mix well. In a third bowl add 3/4 cup strawberry puree, this will be your red layer, and mix well. Bake each cake for 30-40 minutes, or until a toothpick inserted in the middle comes out clean. Let cool completely. Take another piece of parchment paper and top each cake with it, then wrap in plastic wrap and freeze over night.

How to assemble:

Take cakes out of freezer. Allow to sit on counter for a few minutes to thaw slightly. Remove plastic wrap and parchment paper. Take white and red layers and cut in half length wise. Put one half of a red layer on plate and frost and very thin layer of white cream cheese frosting. Place one of the white layers on top and frost a thin layer also. Off to the side stack the remaining red and white layers on top of each other and place the full blue cake on top of them. Take a bowl, about 3" in diameter, and place it upside down on top of the three layers. Take a long knife and while holding the bowl in place, cut down through all layers of cake along the out side edge of the bowl. When finished take the outside part of the blue layer and place it on top of the slightly frosted white layer of cake. Frost the inside edges of the blue layer. Next take the inside round part of the last red layer and put it into the round hole of the frosted blue layer. Thinly frost the top of the red layer. Then take the inside round part of the last white layer and put on top of the red layer inside the blue layer. Frost the entire cake, top and sides. You can choose to top cake with extra blueberries and strawberries or just leave all white. You can either throw away the remaining pieces of cake or make them into a trifle. I did the trifle option, I post that recipe later.

This cake is a huge hit at any 4th of July party. It is a big surprise to see the flag on the inside when you cut into it. Have fun and enjoy and healthier alternative!
Monday, June 27, 2011

Tahitian French Macarons

These are sinfully delicious!! I've made them several times and I've taken them to baby showers and to neighbors. All of the reactions are the same, "Don't these have tons of coconut in them" nope, "Are you sure these are gluten free?" yep, "They're not really fat free are they?" pretty close. The texture is so fun, crispy on the outside and creamy on the inside. I didn't change that much from the original recipe for the macaron base except for the rootbeer variation (click here for original recipe), but I used a completely different filling to make them almost fat free. Try these you'll love them!! Oh and I've frozen them and they freeze great! Just thaw and they taste like you've just made them.
Tahitian French Macarons

Macaron Base

Ingredients

3 egg whites, aged*

5 tablespoons evaporated cane juice

2/3 cup almond flour

1 1/2 cups organic powdered sugar

1 teaspoon vanilla extract (amount will differ with variations)

Directions

In a food processor, mix almond flour and organic powdered sugar until well mixed. Sift the mixture through sieve, and divide in half.

In a medium sized mixing bowl, whip egg white until foamy. While beating on high, slowly add evaporated cane juice. When soft peaks form, add extract and food coloring if desired. Beat until stiff peaks form, has a glossy texture, and mixture doesn't drip from the beaters.

Fold half of the almond mixture into the whipped meringue. When just blended, add additional dry mixture, folding until mixture is blended. Don't over mix. Place mixture in a piping bag fitted with round tip, or a large zip lock bag and cut off one corner. On a parchment lined baking sheet, pip small circles, about the size of a quarter. Once cookie sheet is full, tap sheet firmly against the counter, or flat surface. This helps the macaron to get it's pied shape.

Let dry, uncovered for 30 minutes. Preheat oven to 300* F. Once they have sat for 30 minutes bake for 15-17 minutes. Tap cookie sheet firmly against the counter one more time before baking. Cool completely. Pipe a small amount of meringue frosting (see recipe below) on flat side of macaron, top with other half making a sandwich. Refrigerate until ready to serve.

*Aged egg whites: covered and set at room temperature overnight. (left mine out for about 3 hours and they were at room temperature)

Meringue Frosting

Ingredients

6 tablespoons evaporated cane juice

1 large egg white

1 1/2 tablespoons water

1/4 teaspoons cream of tartar

pinch of salt

1/2 teaspoon vanilla extract (amount will differ with variations)

Directions

Bring a few inches of water to boil in a sauce pan that can hold an electric mixer bowl above the water. Whisk the evaporated cane juice, egg white, water, cream of tartar, and salt in the bowl by hand. Set the bowl above the boiling water and beat with an electric hand mixer at high speed until stiff peaks form, about 9 minutes. Remove from the heat; beat in the vanilla. Pour into a piping bag fitted with a round tip, or a large zip lock bag cutting off on of the corners.

Variations:

Rootbeer Float

-Use 1 teaspoon Rootbeer extract in place of vanilla to the macaron base

-Don't change anything with the meringue frosting

Guava Raspberry

-Use 1/2 teaspoon raspberry extract and 1/2 teaspoon vanilla extract in place of the vanilla, and 3 drops pink food coloring to the macaron base

-Use 2 -3 tablespoons frozen guava passion fruit concentrate to meringue frosting in place of vanilla, and 2 drops pink food coloring to the meringue frosting.

Kiwi Lime

-Use 1/2 teaspoon vanilla and zest of 1 lime in place of vanilla, and 5 drops neon green food coloring to the macaron base

-Use 3 tablespoons kiwi puree and 4 drops neon green food coloring to the meringue frosting. (For every 1 kiwi I pureed I added 3 teaspoons evaporated cane juice)

Pina Colada

-Use 1/2 teaspoon vanilla and 1/2 teaspoon banana extract in place of vanilla and 5 drops of yellow food coloring to the macaron base

-Use 2-3 tablespoons frozen Pina Colada concentrate (Bacardi's) in place of vanilla to the meringue frosting.

Banana Cream Pie

-Use 1/2 teaspoon vanilla and 1/2 teaspoon banana extract in place of vanilla and 5 drops of yellow food coloring to the macaron base.

-Don't change anything with the meringue frosting.

Friday, June 24, 2011

Fun Food Find Friday!!

When I first walked by this Walden Farms Caramel Dip, I thought it sounded too good to be true. It claims to be fat free and calorie free and sugar free. How could that taste good? So I bought some. It does have splenda in it, which I always try to stay away from. But other than that it wasn't too bad. I'll be honest it wasn't the best caramel dip I've ever had but it was the best fat free caramel dip I've ever had. My kids didn't mind it and my sister didn't think it was too bad either.


I found this at the health food stores.

Tuesday, June 21, 2011

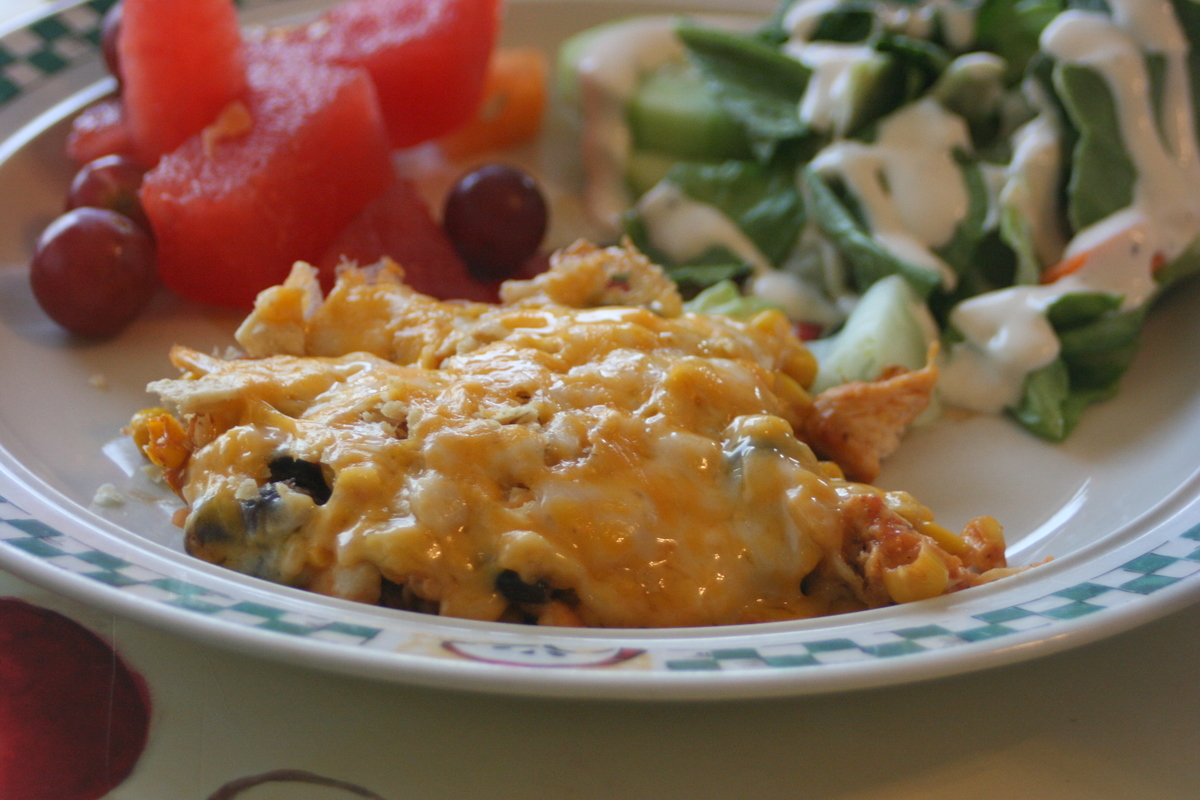
Mexican Casserole

I love how quick and easy this recipe came together. It has a very good Mexican flavor to it. If you had a rotisserie chicken on hand it would make this dish even quicker to put together. This recipe calls for ingredients that I always have on hand, another reason why I liked it so much. So if you're having a long day and you don't know what to make for dinner that's quick and easy, this is the dish for you!

Mexican Casserole

Ingredients

3/4 pound boneless skinless chicken, either breast or tenders, cubed

1 tablespoon butter

1 heaping tablespoon taco season mix, found here

1 can black beans, drained

1 can corn, drained

1/2 cup salsa

2 tablespoons water

1 cup shredded Mexican-style cheese, or what you have on hand

1 1/2 cups crushed plain tortilla chips

Directions

Preheat oven to 350*F. In a skillet cook chicken in butter over medium heat until chicken is no longer pink inside. Add taco seasoning, beans, corn, salsa and water. Stir and cover. Simmer for 10 minutes to let the flavors merry together.
Transfer chicken mixture to a 9x13 inch baking dish. Top with crushed tortillas chips and bake for 15 minutes. Then add cheese and bake until cheese is melted, then serve and enjoy!!

Monday, June 20, 2011

Chicken and Veggies

People ask me all the time what I eat, especially those who know me well. I've even been asked to say exactly what I've eaten the day before. Eating healthy really isn't that hard once you've started it. And if you have healthy food already in your house it's easy to just throw something together without a recipe.

Today is an example of that. One night a few weeks ago I didn't know what to make for dinner. I wasn't really feeling inspired to cook and spend a while experimenting on something new. When I looked in my fridge I found squash, zucchini, chicken, onions and garlic. So I chopped up all of the veggies and chicken. I started by cooking the garlic, onions and chicken in a skillet (If you add those three ingredients and then turn the heat on there is no need for oil or fat because the juices from the chicken and onion are plenty of liquid as long as you keep the temperature low and cover with a lid while cooking). Once the chicken is cooked through I added the rest of the veggies. Then a little salt and pepper. Cook for a few more minutes until the veggies are cooked to your liking and there you go. A quick, easy, healthy meal with what I had in my fridge. Happy Healthy Eating!!

Friday, June 17, 2011

Fun Food Find Friday!!

I'm always on the look out for healthier snacks I can put in my purse or in the car for the kids when they get hungry while driving or when we're out running errands. I really like these One Organic Food Bars. The blueberry flavor was my favorite. My kids like them both. They also have a lot of protein in them.


I found these at the health food stores.

Thursday, June 16, 2011

Donuts

It was national donut day a few Friday's ago. So I went out and bought myself a donut maker and started experimenting. I am loving this little machine! We have had so much fun the last couple of weeks! Besides being extremely low fat, these are so easy to change flavors to make them very unique. They are fast to make and really don't take that much effort.

Basic Donut Recipe

Ingredients
1 cup kamut, spelt, or whole wheat flour

1/2 cup evaporated cane juice

1 tablespoon baking powder

1 egg

1/2 cup rice milk

1/2 teaspoon vanilla

4 tablespoons applesauce

Directions

Stir flour, evaporated cane juice, and baking powder together. Then add egg, rice milk, vanilla and applesauce. Beat with electric mixer for one minute. Pour batter into a large ziplock bag. Cut off the tip when ready to pour into donut iron. Squeeze batter into each donut shape until almost full, make sure not to have any batter in the middle or you will not get your hole. Follow cooking directions of your donut iron, and enjoy!!

Yields about 35 donuts

Basic Glaze

Ingredients

Organic powdered sugar

Water

Directions

In a small bowl pour powdered sugar, add a very small amount of water. Stir until sugar is dissolved. If you need to add a little more sugar or water you can. The consistency should be a little thick but not too thick. Dip one side of donut in glaze and place on to cooling rack until glaze drys, then enjoy!

Variations

Carob Frosting

Melt Carob chips in microwave in a small glass bowl. Click here for more detailed instructions. Dip one side of donut in carob. Then place onto cooling rack until carob sets, then enjoy!
Butterscotch Frosting

Melt Butterscotch chips in microwave in a small glass bowl. Follow instructions on the back of the bag. Dip one side of donut in melted butterscotch. Then place onto cooling rack until it sets,then enjoy!

Banana Coconut Donuts

Ingredients

1 cup kamut, spelt, or whole wheat flour
1/2 cup evaporated cane juice
1 tablespoon baking powder
1 egg
1/2 cup rice milk 1/2 teaspoon coconut extract

4 tablespoons applesauce

Banana extract

Water

Organic powdered sugar

Directions

Stir flour, evaporated cane juice, and baking powder together. Then add egg, rice milk, coconut extract and applesauce. Beat with electric mixer for one minute. Pour batter into a large ziplock bag. Cut off the tip when ready to pour into donut iron. Squeeze batter into each donut shape until almost full, make sure not to have any batter in the middle or you will not get your hole. Follow cooking directions of your donut iron.

Banana Glaze: In a small bowl add organic powdered sugar, a little banana extract and a little water. Stir until sugar dissolved. Add more sugar if needed to make it thick. Taste to see if you need to add more banana extract. Dip donuts in glaze, then place on cooling rack until glaze sets, then enjoy!