Showing posts with label Gluten free. Show all posts

Friday, August 27, 2010

Fun Food Find Friday!!

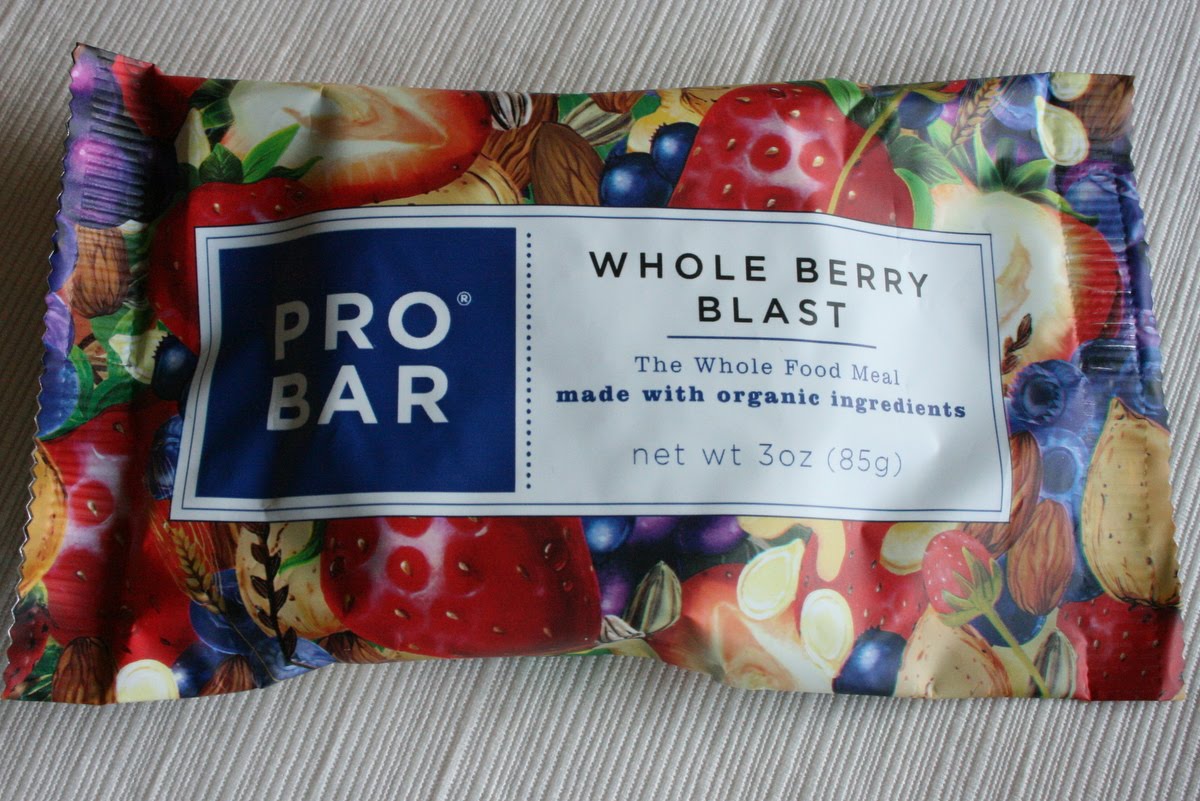
Our fun food find for today is another meal bar, PRO BAR. I know what you are think, why another meal bar? Well I'll tell you. It's because they are so healthy for you and they are great to take in the car, in your purse, the diaper bag, camping, hiking, 72-hour kits, really there are so many reasons to have a few laying around. Besides variety is always good. These bars are a little different than the others that I've shared with you. For one they are bigger, so more calories. This whole berry blast is 370 calories, so perfect for your 72-hour kits! They have a few more nuts in them so more sustainable energy. In fact this bar has 720 mg of omega 3 fatty acid and 1530mg of omega 6 fatty acid. Extremely important to your health, especially if you are stranded or in an emergency situation. The fruit in these bars is a little more chunky. So that can be a good thing or a bad thing. I like it, my little 2 year old picked out the papaya. These are a little more expensive but it is a little bigger of a bar.
You can find these at any grocery store by the protein bars. Costco just started carrying them too, but I haven't compared prices yet. Happy Healthier Eating!

Monday, August 23, 2010

Stuffed Green Peppers

I loved this recipe and so did my children. My 6 year old doesn't like green peppers but he ate this and really liked it! I thought today would be a good time to post this recipe because of all of the peppers that should be ready about now in your garden. And if you didn't plant any they are getting cheaper to buy in the grocery store. Just thinking about this recipe makes me want to make these again for dinner tonight. :] With stuffed peppers I've seen them cut both ways. I think that cutting them lengthwise, like I did in this picture, was the easiest way to stuff and cook them. Just be careful when removing the top of the pepper so you don't remove too much of the pepper. If you remove too much then it won't be in a bowl shape and it won't hold the stuffing as well. No matter what way you cut them they are very delicious.
Stuffed Green Peppers
Ingredients
1 cup water
1/2 cup uncooked quinoa, rinsed
1/2 teaspoon garlic powder
2 teaspoons better than bullion
3 large green bell peppers, halved and seeded
1 small onion, diced
1 15 oz can diced tomatoes with garlic and onion
2 cups shredded cheddar cheese
2 teaspoons butter
1/2 teaspoon cumin
1/4 teaspoon Chile powder
1/4 teaspoon dried oregano leaves
1/3 cup Parmesan cheese
Salt to taste
Pepper to taste
Directions
In a medium saucepan combine water, quinoa, garlic powder, and better than bullion. Bring to boil, and then simmer for 15 minutes.
Preheat oven to 400*F.
In a large saucepan over medium heat cook onion in butter. Then add diced tomatoes, cumin, Chile powder, oregano, salt and pepper. Simmer until thick, stirring occasionally.
In a pot bring 2 inches of water to a boil. Blanch peppers for 2 to 3 minutes. Set aside in a 9x13 inch parchment lined baking dish.
When tomato mixture is thick add Parmesan cheese and cooked quinoa and combine. Spoon combined mixture into each half of the green peppers. Cover with tinfoil and bake in preheated oven for 25 minutes. Uncover and bake for another 15 minutes or until peppers are al dente. Remove from oven and sprinkle Cheddar cheese on top of each pepper. Return to oven just long enough for cheese to melt, about 5 minutes. Remove and enjoy!

Thursday, August 19, 2010

Lettuce Wraps

The first time I ate at P.F. Chang's was back in the day with my then soon to be husband and his parents. They ordered everything for me. The first thing to come out were their lettuce wraps. I fell in love with them. The crunch of the lettuce with the chicken and rice was simply genius! So of course I told my mom about them. She tried the lettuce wraps also loved them but took it one more step and created her own version. I actually like hers better than the restaurant's. And they're not that hard to make either, don't let all of the ingredients fool you. Try them, you'll love them I know it!!
Lettuce Wraps
Ingredients
2 tablespoons braggs' liquid aminos
2 tablespoons organic brown sugar
1/2 teaspoon rice vinegar
2 tablespoons butter or oil
2 chicken breast fillets
1 cup water chestnuts, minced
3 tablespoons green onion, minced
1 teaspoon garlic, minced
1 head of romaine lettuce
1 -2 cups rice, cooked according to package directions
Special sauce:
1/4 cup water
1 tablespoon rice vinegar
1 tablespoon braggs liquid aminos
1 table spoon ketchup
1/2 tablespoon lemon juice
2 tablespoons evaporated cane juice
Special sauce directions:
Pour all ingredients into small bowl. Stir until cane juice dissolves. Refrigerate sauce until ready to serve lettuce wraps.
Directions
Mix organic brown sugar, water, and braggs' liquid aminos together, set aside. Heat 1 tablespoon butter on high and saute chicken breasts for 4-5 minutes per side or until done. Remove chicken from pan and let cool. When you can handle the chicken chop it up into small pieces no bigger than a dime. Add additional tablespoon of butter to the left over butter from the chicken. Then add garlic, water chestnuts, chicken, and onion. Add organic brown sugar/braggs'/vinegar sauce and cook for a couple of minutes.
To eat: spoon a little rice down the middle of one romaine leaf (in the picture I add too much of everything and it was a little hard to eat). Spoon chicken filling on top and drizzle with a small amount of special sauce (a little goes a long way). Roll and eat like a taco and enjoy!!

Tuesday, August 17, 2010

Orange Honey Garlic Crock Pot Chicken

Because it was so hot in July I used my crock pot several times. The original recipe I used to get this recipe is for a marinade. But it sounded so good I just had to try changing a few things and making in the crock pot. I loved how it turned out, sweet, a little tangy, with a hint of orange. And you know me I love sweet peppers so I think they make a great addition too, but you don't have to add them.
Orange Honey Garlic Crock Pot Chicken
Ingredients
2 boneless skinless chicken breasts
4 tablespoons braggs' liquid aminos
3 tablespoons honey
3/4 cup orange juice
2 teaspoons minced garlic
1/2 teaspoon dried oregano flakes
1/4 teaspoon paprika
2 tablespoons corn starch
1/2 green pepper, sliced
1/2 red sweet pepper, sliced
1/2 yellow or orange pepper, sliced
1 cup quinoa, cooked according to package directions
Directions
In a medium size bowl combine the braggs, honey, orange juice, garlic, oregano, paprika, and corn starch. Place chicken in crock pot and cover with mixture. Cook on high for 5 hours. Remove chicken and slightly shred. Return to crock pot and top with sweet peppers. Cover and cook for another 10 -20 minutes depending on how well done you like your peppers. Stir in peppers before serving on cooked quinoa.

Friday, August 13, 2010

Fun Food Find Friday!!

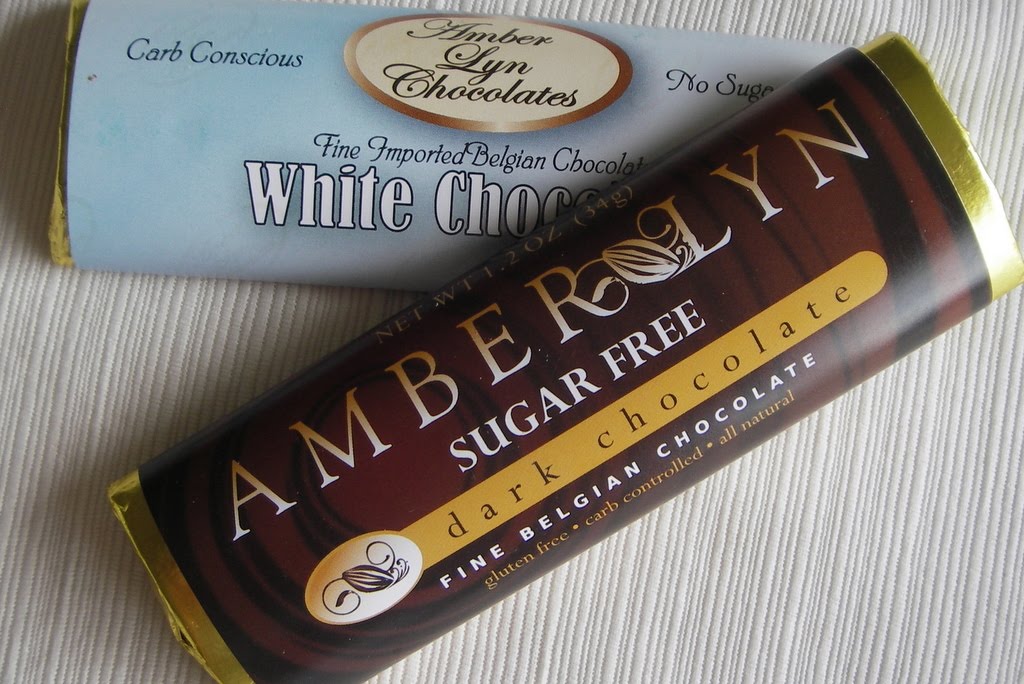
Amerlyn Chocolate is our food fun for the day. It is a sugar free, gluten free, dark chocolate. It is very tasty. I haven't used it in very much cooking. We've used it on smores when we didn't have a carob bar handy and they were really good. If you like dark chocolate you'll love this healthier choice.
You can find these at the health food stores in the gluten free sections.

Thursday, August 12, 2010

Carob Flourless Cake

I love how this cake finally turned out. This recipe took several tries to get it right, and it was worth it! This cake is so extremely moist and oh so delicious. It isn't too rich or sweet. I love that it has all of the extra fiber from the beans. The pureed strawberries cuts down the taste of the garbanzo beans. I took this to my Aunt for her birthday and stressed to her that it wasn't chocolate, if you think it's a chocolate cake before you bite into it it won't taste the same, and she loved it! I was a little nervous because she is a big chocolate lover. She called me on the phone to ask what it was because she had forgotten it was Carob, and just raved about how yummy it tasted. Really if you get the right carob then it can taste like a dark form of chocolate. So happy healthy cooking with this easy and quick recipe!

Carob Flourless Cake
Ingredients
1 1/2 cups carob chips
1 15 oz garbanzo beans, drained and rinsed well
4 eggs
1 cup evaporated cane juice
2 teaspoons baking powder
1 cup strawberries, pureed
3-4 tablespoons orange strawberry banana juice
2 teaspoons vanilla extract
Directions
Preheat oven to 350*F. Grease and line the bottom of one 9 inch round cake pan with parchment paper. Melt carob chips in double broiler on stove. Combine the beans, pureed strawberries, and eggs in a blender or food processor until smooth. Add the vanilla, juice, baking powder, and cane juice and blend well. Pour melted carob and blend until smooth. Pour mixture into pan. Bake for 40 minutes or until a toothpick comes out clean. Cool on a wire rack. When cool invert onto a plate. Remove parchment paper and top with Carob Pudding and fresh cut strawberries and enjoy!

Monday, August 9, 2010

Carob Pudding

I have had a lot of fun experimenting with this recipe. To be honest I had to make it several times to get it where it is today. It was hard to get it to thicken, like a pudding should be. Granted it still isn't as thick as the instant pudding you buy from the store, but it is very yummy and very creamy. The really good thing is with all of the batches that didn't turn out I was able to freeze them in little cups and make 'carob/fudge-cicles' with it. Those were very delicious, my kids loved them too. Beside just eating it on it's own, I've also used this pudding on a few different cakes I'll post later. It really is a nice rich pudding. I hope you like it as much as we do!

Carob Pudding
Ingredients
1 cup evaporated cane juice
5 tablespoons cornstarch
1/4 teaspoon salt
2 cups rice milk
1 cup carob chips
2 egg yolks
2 teaspoons vanilla extract

Directions
In a medium sauce pan combine evaporated cane juice and salt. In 1/2 cup of the rice milk mix in the cornstarch. When cornstarch is completely dissolved add to the sauce pan and turn heat on medium. Add remaining rice milk and carob chips. Stir constantly until carob melts and the mixture starts to thicken. Remove from heat. Take a tablespoon of the mixture out and add to the egg yolks and stir, repeat twice. Put mixture back on heat. Slowly add the egg yolks, stirring continually. Cook for another 2 minutes. Remove from heat and add vanilla. Chill before serving, and enjoy!

Thursday, August 5, 2010

Green Drink

I love "green drink", as we call it in our home. I used to buy Odwalla's form of green drink all the time. Then I decided to make it at home so I could control more of what greens go in it. I love it I have it almost every morning for breakfast. I do share it with my children, but only one glass. It's so funny to me how much they like it and ask for seconds. If the color is a problem for you or your kids try putting it in a dark sippy cup or water bottle, and don't let them see you make it. You will really be surprised at how sweet and yummy this drink really is. One of the important tricks that I've found is that you need to freeze the greens. Well at least I do because I don't have a high powdered mixer. I just have the normal one that my husband and I received when we got married. When they are frozen they blend completely and you don't have little pieces of greens floating around. Also you don't have to add ice that way.
Green Drink
Ingredients
2-3 cups Kale, frozen
2 cups other leafy greens, frozen (I usually use spinach but I have used romaine, Chinese cabbage, and others)
2/3 cup apple juice
1/3 cup pear juice
1/2 cup rice milk
1 banana, peeled
1 cup strawberries, frozen
1/3 cup blackberries
1/2 cup blueberries
2-3 tablespoons honey
Directions
Put Kale and other greens into blender. Add rice milk and apple juice. Turn on blender to the highest speed. It will take a few minutes for the greens to blend completely. If your blender starts to struggle add the pear juice or use one of the frozen stems from the kale to push the greens down a little. Once the greens are completely mixed in and smooth, add the banana, berries, and pear juice (if not added before). Blend on high until completely mixed. Once it is all blended taste it before you add the honey, you might not need it. Serve right away and enjoy!
Variations:
I don't always have fresh berries on hand. If I don't then I just use a frozen medley of blackberries, strawberries, and raspberries. Sometimes I add a whole peeled pair and use what ever juice I have on hand. As long as you are using at least 4 cups of greens to just over 2 cups of fruit you'll be good. Sometimes I even add less fruit and my kids don't notice except for the color is more green than a purple green.

Friday, July 30, 2010

Fun Food Find Friday!!

Today our Fun Food Find is another wonderful bulk food item, Honey Taffy. In our home we love these taffy's. They have a few flavors. My favorite is the peppermint. When the kids got taffy from the parades over the 4th of July we were able to trade them with these taffy's. Just to see what the difference was in flavor I tried a peppermint taffy from the parade, I didn't swallow it just tasted it and spit it out. Then I tried a honey taffy. I was so amazed and the difference in taste! The honey taffy had ten times more flavor than the parade taffy. I love it when I find a healthier alternative that tastes so much better than the stuff that isn't good for you. Go try some for yourself and see.
You can find these at the health food stores.

Friday, July 23, 2010

Fun Food Find Friday!

I just found these Nut-Thins, so they are our Fun food find for today. They are gluten free and I was surprised at how much flavor they have. They are a very good gluten free cracker. The only ones my kids couldn't handle were the BBQ ones. They have a tons of flavor and were a little too strong for them. I thought they were good. :]
I've seen these at the health food stores and at WinnCo. I haven't looked for them in other grocery stores yet.

Friday, July 16, 2010

Fun Food Find Friday!!

Today's Fun Food Find I introduced yesterday. I know I probably should have waiting, but I was so excited about the ice cream sandwiches I really couldn't help it! Rice Dream and Almond Dream Frozen Desserts. So far there isn't a flavor that haven't liked, and so far I've only seen gulten free flavors. When I saw the Praline Crunch a few weeks ago I had to buy it. Growing up my most favorite flavor of ice cream was Pralines and Cream. I had it in ice cream cake every year for my birthday. When I tried Praline Crunch, I was extremely surprise at how similar it was to the real thing! I was completely satisfied. So now for my birthday this year I'm going to experiment and try to make my self a ice cream cake!
I've only seen these at the health food stores.

Thursday, July 8, 2010

Barbeque Chicken Loaf

My kids love meat loaf. I've been wanting to try other types of meat in loafs. When I saw this recipe I thought it sounded good and I've never used ground chicken before. I changed the original recipe so much that I have also changed the name. I really enjoyed this. To me it was a different take on BBQ chicken. My kids loved it! In fact my oldest, who is 6, has asked me to make it several times. I don't use loaf pans when I make my meat loafs. I like it a little better flat, cut into squares, but that is just me. Enjoy something different!
Barbeque Chicken Loaf
Ingredients
1 pound ground chicken
2 eggs
1 small onion, minced
2 cloves garlic, minced
2 teaspoons ketchup
4 teaspoons honey barbeque sauce
1 1/2 cups Gluten free multi grain crackers, crushed
Directions
Preheat oven to 350*F. In a large bowl combine the chicken, crackers, egg, onion, and garlic. Mix together, then add ketchup and barbeque sauce. Mix well and pour into a bread loaf pan or casserole dish. Bake in preheated oven for 50 minutes. Remove and spread extra honey barbeque sauce on top, just enough to cover. Put back in oven and turn oven off. Let sit in hot oven for an additional 15 minutes.

Tuesday, July 6, 2010

Grilled Honey-Soy Chicken

I eat a lot of grilled chicken. So when I find different marinades for grilled chicken I get excited and want to try them. This one is very good and I only had to change it a little to make it more healthy. It is great as a sandwich, shown in picture above with Crusty Boule Rolls, or to eat it alone is wonderful too.
Grilled Honey-Soy Chicken
Ingredients
1/3 cup orange juice
2 tablespoons Braggs
2tablespoons honey
1 teaspoon lemon-pepper seasoning
1/4 teaspoon ground ginger
1 teaspoon garlic powder
4 medium boneless skinless chicken breasts, or 7 chicken tenders (I used the chicken tenders)
Directions
In a shallow glass dish combine orange juice, braggs, honey, lemon-pepper, ginger, and garlic powder, set aside. Place each chicken breast between 2 piece of plastic wrap. working from center to the edges, pound lightly with the flat side of a meat mallet to an even thickness. Remove plastic wrap. Place chicken pieces in marinade. Cover and chill for 4 to 6 hours or overnight. Remove chicken from marinade, reserving marinade. To grill, place chicken on an uncovered rill directly over medium heat. Grill about 12 minutes or until tender and no longer pink. Turning and brushing chicken with marinade only once. Discard any remaining marinade. Serve on buns or enjoy on it's own.

Friday, July 2, 2010

Fun Food Find Friday!

The fun food find today is pretty much a staple at our house. Stretch Island Food Company's fruit leather. I do make my own fruit leather but it doesn't last long around my house and these are just fruit so just as healthy as my homemade ones. They are very good and extremely easy to carry around with you. I keep them in our pantry, my purse, the car, 72 hour kits, and church diaper bag. My niece knows that I keep treats like this in my purse so when ever she sees me with my purse she asks if she can have a treat. It's so cute!
You can find these at all of the health food stores and some conventional grocery stores. But the cheapest is once again at Costco. Happy healthy snacking!

Monday, June 21, 2010

Braised Chicken with Fennel and White Beans

I got a fennel and didn't quite know what to do with it. I love the flavor of fennel. It is what they use to flavor black licorice. And like I've mentioned before, I LOVE black licorice! That being said I had no idea how it would taste in food, with other things besides treats and candy. I searched and found the original recipe here. The title sounds like it's a hard gourmet dish to make, but it was actually easy, just a little bit of cutting. I was surprised by the flavor, very sweet. It didn't taste like black licorice at all. I was so shocked by it that I took it to two different families to have them try some. There reactions was it was delicious, sweet, and the flavors complement each other very well. So if you're in the mood to try something new, try cooking with fennel with this recipe. :]
Braised Chicken with Fennel and White Beans

Ingredients
10 chicken tenders
1/4 teaspoon salt
1/8 teaspoon pepper
1 small onion, sliced
2 large garlic cloves, finely chopped
1 fennel bulb, quartered, cored, thinly sliced
1 medium red bell pepper
1/2 green bell pepper
1 small orange bell pepper
1 28 oz can diced tomatoes
1/2 cup white grape juice
1 can white beans, drained and rinsed
1 tablespoon dried parsley flakes
1 1/2 tablespoons butter (ICBNB spray)
Directions
In a deep pot, heat butter over medium-high heat. Sprinkle chicken with salt and pepper. Add chicken to pot. Cook 5 to 6 minutes, turning occasionally, until chicken is light golden brown. Remove chicken from pan. Add onion, garlic, fennel, and bell peppers. Cook 2 to 3 minutes, stirring constantly, until vegetables are crisp-tender. Add chicken, tomatoes, and white grape juice. Heat to boiling. Reduce heat, cover and simmer 20 t 25 minutes or until chicken is tender. Uncover, and stir in beans and parsley. Cook about 5 minutes longer or until sauce is slightly thickened with juice of chicken is cooked through. Serve in shallow bowls. The Crusty Boule bread from here would be wonderful to dip into this dish with it's wonderful flavors.

Friday, June 18, 2010

Fun Food Find Friday!

Yummy Earth Organic Suckers is our fun food find today. If you don't have time to make your own homemade suckers like I told you about yesterday, you can buy these. The taste is very good. They are not too sweet like conventional suckers. They are made with evaporated cane juice. They color the suckers with beet and carrot juice, so no dyes! And no you can not taste the beet or carrot. :] I keep these all over, in the car, in my purse, in our 72 hour kits, and I've even taken lots of these to my children's school. The teachers have used them to give to all of their students and especially to my children when other treats are given.
You can find these at the health food stores in their bulk sections. I've also bought these from amazon.com for very cheep too.

Thursday, June 17, 2010

Homemade Suckers

We love homemade suckers in my home. I've been making suckers since...well to be honest I can't remember when I started making them. My mom always made them growing up and I'm not sure when she started teaching me how. I've been making these healthier suckers for about three years now.
There are so many fun things that you can do with homemade suckers. You can do half flavors like shown in the picture below. This one is half strawberry and half pina colada, my personal favorite.
You can add jelly beans, gummy bears, and gum to them either in the middle or just sticking out. My mom was very creative with the suckers we grew up with. We always made them for our Valentine's to take to school. Now you can't do that because they're not wrapped but I still make them for my kids to take to neighbor friends. Depending on the molds you have, you really can make them for every holiday.
So now that you know some of the possibilities of suckers, let me share with you how I've changed my mom's recipe and made it a little healthier. First of all I use evaporated cane juice, then I use Agave, that's it! If you search it on the internet you'll find lots of places that say you can't make hard candy using Agave. Well I'm here to tell you, you can! See my pictures. I've also made suckers with just Agave and no evaporated cane juice. The pina colada half from the sucker in the picture was made with just Agave and water. So have fun with it, experiment at home, and have your kids help you with the molds and sticks.

Homemade Agave Suckers

Ingredients
1/2 cup evaporated cane juice
3 tablespoons agave
1/4 cup water
1/4 - 1/2 teaspoon flavoring
food coloring (optional)
Directions
In a medium sauce pan on stove top combine evaporated cane juice, agave, and water over medium high heat. Once combined, cover and bring to boil for one minute. Then uncover and place candy thermometer on the side of pan and cook until the temperature almost reaches 300*F, or until drops of the syrup form hard balls in cold water. Remove promptly, the temperature will continue to raise after taking it off the stove and you don't want it to burn. Stir until the large bubbles have gone down, let sit for 30 seconds. Next stand back and add food coloring, flavoring, and stir. Be careful when adding flavoring it will cause steam to raise! Make sure that the flavoring and coloring are well incorporated. Do not add to molds until the candy liquid starts to thicken slightly. Once the candy liquid is slightly thick pour into slightly greased molds and let cool completely before serving. If adding gummy bears or other types of healthier candy (see future posts) wait to add them until the candy liquid has cooled down even more in the molds or the candy will melt.
Tips:
-If you are using an oil based flavoring you don't need to add that much, only 1/4 teaspoon. The flavoring should tell you if it is oil based or not. If it isn't an oil based flavoring then add 1/2 teaspoon.
-Because Agave is not clear some of the flavors you don't have to add coloring to. I never add coloring to my root beer, because the candy liquid is already brown.
-If you've ever made suckers before you will have a hard time waiting for the liquid to thicken. Be patient!!! Just trust me, I've been making these for years now and I've messed up a lot. Agave takes longer to cool down than corn syrup does.
-Make sure you have your mold ready with the sticks in them before starting to make the suckers.
-Agave can burn very easily, so Watch the temperature closely!
-This recipe only makes about 6 large suckers and about 10 small suckers. It can be doubled very easily. I like to make several different flavors and not have suckers coming out of my ears.
Tuesday, June 15, 2010

Strawberry Orange Buckwheat Pancakes with Strawberry Orange Syrup

It was Mother's Day. My husband was out of town. So what did I do, I experimented for myself. I went kind of crazy on this one and it payed off. This was so delicious! My 2 year old couldn't get enough. And days after he was still asking for 'Straw orange cakes'. The pancakes alone were very yummy, but I think it was the Strawberry Orange Syrup that really makes these. Since then I've made the syrup over and over. It is the syrup of choice now for my three kids. I hope you enjoy it too!
Strawberry Orange Buckwheat Pancakes
Ingredients
1/2 cup buckwheat flour
1/2 cup spelt flour
1/4 teaspoon salt
1/4 teaspoon xanthan gum
1 tablespoon baking powder
1 egg, beaten
1 teaspoon vanilla
1/2 cup strawberry puree
2 tablespoon evaporated cane juice
1 teaspoon orange zest
Directions
Preheat griddle to 375*. Add evaporated cane juice to strawberry puree. In a medium bowl mix flours, salt, xanthan gum, and baking powder well. Then add egg, vanilla, strawberry puree, and zest and mix well. Pour onto griddle. Turn over when bubbles being to pop and edges begin to dry. Serve with Strawberry Orange Syrup (see below).
Strawberry Orange Syrup
Ingredients
Juice of 2 oranges
1 1/4 cup strawberry puree
1 tablespoon orange zest
1 1/2 teaspoons vanilla
1 1/4 cup evaporated cane juice
2 tablespoons corn starch
Directions
Note: Before you squeeze your juice out of your 2 oranges make sure you zest them first.
Add enough water to your orange juice to make 1 1/2 cups. Then add your strawberry puree, vanilla, zest, and evaporated cane juice. Mix well. Pour syrup mixture into small pot and bring to a boil on stove top, stirring occasionally so evaporated cane juice will mix in well. In the mean time add corn starch to 1/4 cup cold water. After syrup starts to boil add cornstarch mixture and stir continually for 2-3 minutes or until desired thickness occurs. Remove from heat and pour on top of pancakes. Enjoy!

Monday, June 14, 2010

Slow-Cooker Chicken Tortilla Soup

The other day I was browsing through recipes at allrecipes.com when I came across this one. It looked good and most of the comments said that it was the most authentic tasting tortilla soup they've come across outside of Mexico. That sparked my interest, so I made it. I didn't really change that much of it. I do have to tell you, it was amazing! It made my house smell so wonderful all day long. But I was a little unsure because it didn't really look like much when it was finished. It almost looked like all the flavors were cooked out. I can say, after eating it, that they were not cooked out. It truly is my most favorite tortilla soup to date, and so easy to make being cooked in a crock pot!
Slow-Cooker Chicken Tortilla Soup
Ingredients
12 chicken tenders, frozen
1 15 oz can diced tomatoes, undrained
1/2 can enchilada sauce (you can add the whole thing I just didn't want it too hot for my kids)
1 4oz can diced green chiles
2 garlic cloves, minced
1 cup water
1 14.5 oz can chicken broth
1 teaspoon cumin powder
1/4 teaspoon chili powder
1 teaspoon salt
1/4 teaspoon black pepper
1 bay leaf
1 10oz package frozen corn
Directions
Pour tomatoes, water, and enchilada sauce into crock pot. Then add onion, green chiles, garlic cumin, chili powder, salt and pepper. Mix well. Then add chicken and corn. Place bay leaf on top and over. Cook on high for 4 to 5 hours or until chicken is cooked through. At about 1 hour stir to make sure the chicken is separated. At 3.5 hours (if chicken is cooked through) take chicken out, shred with fork and knife and return cooking for at least another half an hour to help soak up some of the broth. Remove bay leaf before serving. Serve with crushed corn chips, sour cream, shredded cheese, and guacamole.

Friday, June 11, 2010

Fun Food Find Friday!

Today our fun food find is Carob Chips. Carob is a chocolate substitute. There are a few differnt types of carob chips. Some better tasting than others that's for sure. Now that a WinnCo grocery store has opened up close to where I live I have now found the best carob chips I've ever tasted! They are located in their bulk section and the price isn't too expensive. The taste is sweet and for those who don't like the taste of carob, try these and it will change your mind I'm sure of it!